I'm really excited to see that TLC created this show "Craft Wars." I'm excited to see this show--It premiers tonight! The previews say that there are three different experienced crafters, I wonder what media they will be using. It sounds like a show that I'd really like to be a part of! I will be recaping this show on youtube. Don't forgot to subscribe to my channel
Tuesday, June 26, 2012
Sunday, June 24, 2012
DIY Skirt
 I was in Ghana last January and bought this beautiful dress. I just love the bright colors and the gorgeous print, but the dress didn't fit me too well. I also noticed the seams to be ripping a little bit. I decided to use my own crafting skills, and rework the dress into a high waisted skirt. The dress had a zipper, but when I cut off the top, the zipper didn't work anymore. So i decided to take out the zipper and sew up the seam. I also added a little bit of seam allowance to both sides. Then I used my favorite method of closing--elastic. It works perfect for any closing and it's so simple!
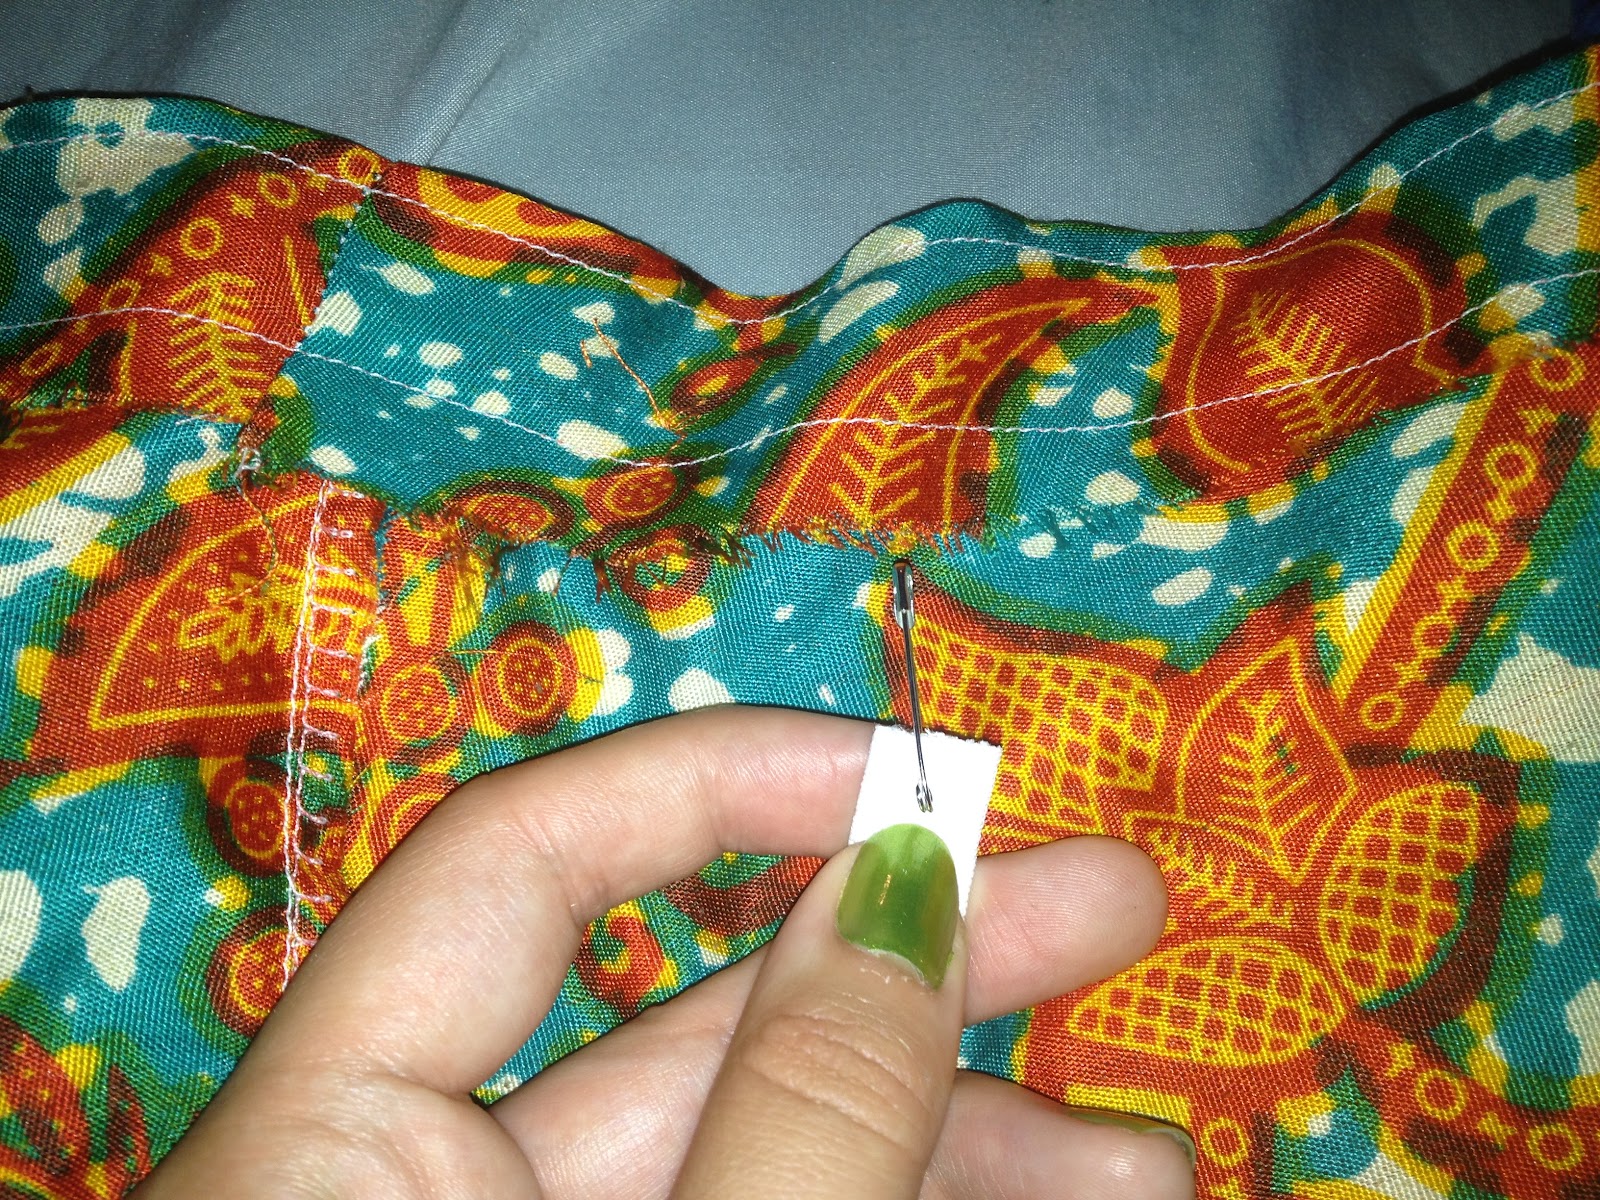
I folded the top over, and stitched it down, and then I ironed it and stitched the top so the elastic won't flip inside. Then I added a safety pin to the elastic, and threaded it through the band. It's a very easy method, and it works quickly.

The skirt looks really cute high waisted with a tank top for summer. And now, it's appropriate for work :)

Saturday, June 23, 2012
How to Braid Hair
Here is the fishtail braid. It's easy once you figure out how to hold the pieces with your fingers. It especially looks pretty on long hair, but short hair would be pretty as well.
Sunday, June 17, 2012
Crayon Art--Trial-Error
I saw a few new crafting ideas on pinterest, and wanted to try them out. I went to Walmart and bought a hot glue gun, some poster board, contact paper, and a box of crayons. I wanted to make a cook poster of a quote. First I decided on my favorite teaching quote


"A teacher is one who makes himself progressively unnecessary"
So I printed off the letters I needed in a neat font--Helvetica. Then I cut them out, to trace on my contact paper. Make sure to trace the letter backwards, so that they will be the right way when you cut them out.


Then I used a funky scissors to cut out the letters, and stuck them to my poster board.

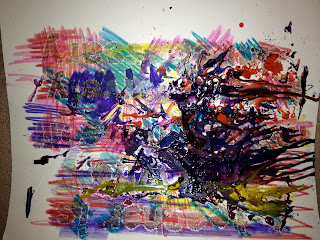
Finally I decided to try something I saw on Pinterest. I saw that you can use a hot glue gun to melt crayons. So I peeled some crayons and put them through my hot glue gun. It didn't work as well as I suspected, and it made a big mess. ( I would not recommend it)


So since I didn't really like the hot glue gun melting the crayons, I decided to just color a litte myself, and then I tried melting the crayons a little with a blow dryer. It turned out okay.

Last, I peeled off the contact paper, and then you can (kinda) see the quote.


Sunday, June 10, 2012
Rise Above
Since I haven't blogged for a long time, I haven't shared any of my recent projects. I wanted to try out this melted crayon on canvas myself. I saw it all over Pinterest, and thought it would be a nice addition to my apartment. I went to Hobby Lobby and bought a canvas board for $7.00 and then I got two boxes of 24 Crayola crayons. I really like cartoon monsters, so I thought I'd try and draw on on the canvas first. I used Sharpies and crayon. (As you can see the crayon melted with the other crayons). I really liked the bottom, but there was just too much white space on the top, and it was not a good composition.
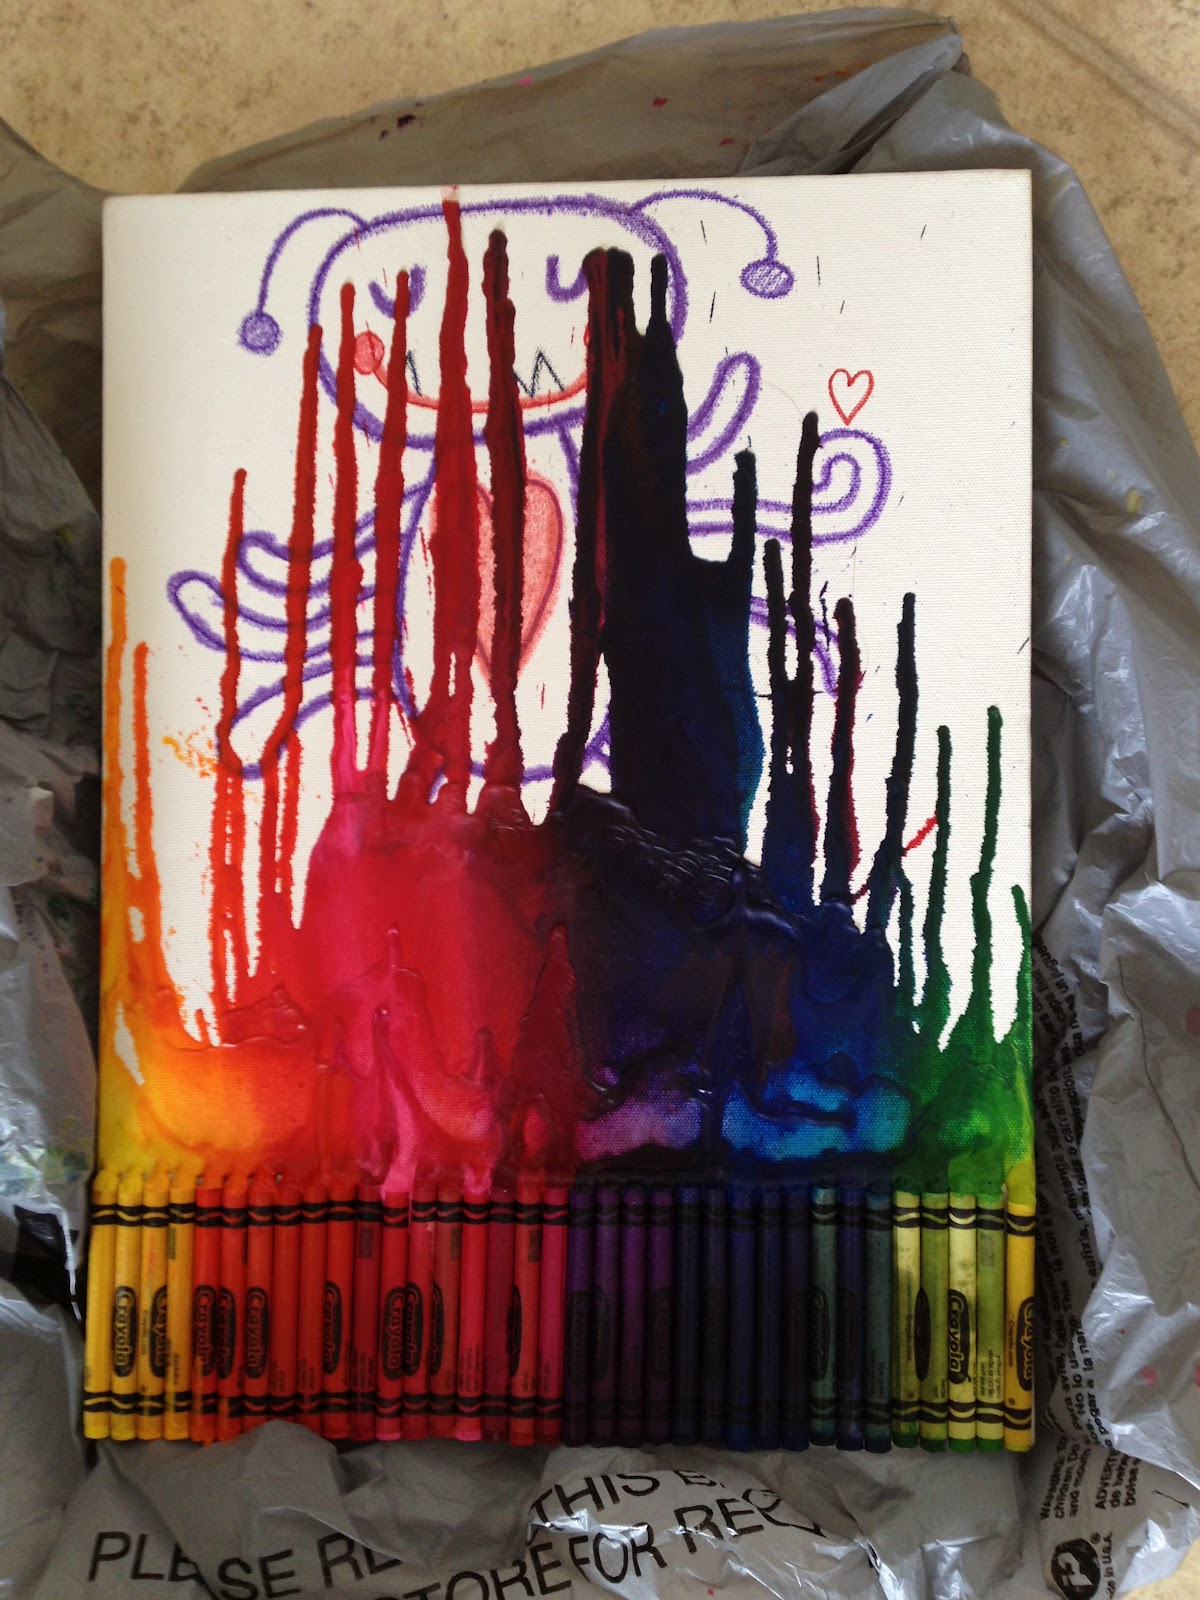
So I didn't really like it at first, and decided to change it a little bit. Next I took my blow dryer and keep melting the crayons. I used a plastic bag, so that the crayon wasn't all over the floor and walls. I kept melting the crayons, and the monster was mostly gone, except on the light color side. So I decided to add some floating crayons, then I really liked the idea of mixed media, so I used fabric glue and added some fabric. Finally I added ribbon to my composition. Can you guess why I named this piece "Rise Above"
(The crayons at the bottom are like the "normal" crayons. The fit in with everyone and are in a straight line. The unusual crayons are "rising above" and being different, unique and themselves)

Instructions:
What you will need:
1. Crayons
2. Canvas
3. Blow Dryer
4. Tacky Glue
5. Fabric (optional)
6. Ribbon (optional)
Steps:
1. Glue your crayons on the bottom of your canvas
2. Let the crayons sit for about 30 minutes for the glue to dry
3. Use your blow dryer to melt the crayons. Hold the canvas upright, so that the crayons will spread. (I held my canvas into the garbage can so that the crayons wouldn't color my walls and floors)
4. Glue on some floating crayons and continue to melt the crayons using the blow dryer.
5. Glue on fabric and ribbon.
Messy Sewing Room
I haven't been blogging, because I haven't been sewing. My sewing room (aka my bedroom) is so messy, that I don't wanna sew. I will be cleaning it this week, because I am sewing a dress for my brother's wedding which is in a month! I started cleaning up a little bit, and I found so much fabric that I bought and never made anything with, and tons of patterns. So hopefully once my sewing room is organized I'll be sewing (and blogging) more.
Happy Sewing :)
Happy Sewing :)
Subscribe to:
Posts (Atom)